Tackle It on Tuesday: The Craft Room

I have a love/hate relationship with my craft room. What a blessing it is to have the space in our home to have a room dedicated to be filled with many craft supplies, tools, and books to complete the many craft projects that I love to work on.

craft room reorganization

But unfortunately, I am a Queen of Unfinished Projects! Which leads to piles of projects all over this room, well, because there is room in there to pile them up! Since our trip to Mexico in JanuaryI have really been thinking about how much unused stuff we have in our home.

piles of unused cookbooks

I love to cook and bake, but when I have two shelves of cookbooks in my home that I haven't used in years, should I keep them?

tub of unused sewing patterns

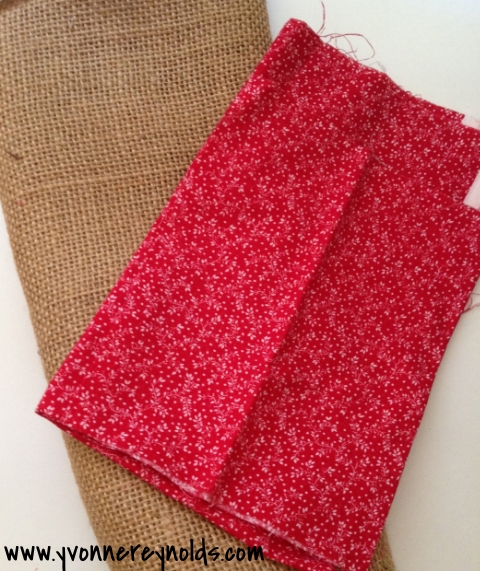
And as much as I love to sew, do I really need to buy all those patterns just because they were a dollar each? I mean really, how many jumper patterns for little girls does one mom need?

photos of my children

In all of my decluttering tasks, I found these treasures that were printed at least two years ago. Rather than enjoying these photos of my children up on my wall, these have been hiding in one of many piles in my craft room. Really sad, isn't it...

Now don't get me wrong, I do really love my craft room. Knowing that I can go in there and find craft paint, felt, scrap fabric, and many other craft supplies keeps me out of the store spending money that I shouldn't be spending. But when I look at the piles of projects that have not been finished, or some even started, it makes me uncomfortable. As my daughter would say, that money could have been spent on a Compassion child

Thankfully, most of the items I have been clearing out of my craft room are still in really good condition, and I am hoping to sell a lot of stuff at an upcoming yard sale with the money to be used toward my upcoming trip with Compassion to Colombia

So what am I going to tackle this upcoming week? Getting those precious photos matted, framed, and hung up on the wall, so I can enjoy the blessings that God has given me here.

What will you be tackling this week?

Tackle It on Tuesday: Denim Star Garland with Tutorial


Denim star garland tutorial

This week, I tackled another fun creative project (Pinterest inspired!) using some scrap pieces of denim, burlap, fabric, buttons, and jute. I tried to take pictures along the way so if you want to try making this at home, you can follow along and make one of these for your own home.

supplies for denim star garland

The supplies you will need for this project: denim, fabric, burlap, quilt batting, jute, buttons, embroidery floss, star stencil, scissors, needle, and a disappearing ink pen.

cut out star shapes from old denim

I found a star stencil in my scrapbook supplies and used that to cut a star template out of cardboard for tracing around on the denim. My template was about 4 inches across. The garland has seven stars across and I doubled them up, so be sure to cut out 14 stars from the denim.

denim, burlap, fabric heart, and a button

Your embellishments for the star are going to be a bit of burlap, a fabric heart, and a button. 

attach embellishments to denim star

Layer your embellishments on one of the denim stars. Then with some embroidery floss, sew through all layers (denim, burlap, fabric, and button) to attach the button to the denim. You will repeat this step seven times, once for each star that will be along your garland.

sandwich all layers of denim, batting, and jute

Once you have attached all of the embellishments to the stars, you will start attaching the stars to the jute. Take one plain denim back, one quilt batting star (I cut these just a bit smaller than the template, the jute (which you have cut to about six feet or so), and the top denim star. Fold the cut jute in half to find the middle. This will be your starting point for sandwiching the star pieces to the jute.

sew a running stitch around the outside edge of the star

Pin the star pieces in place, take some embroidery thread, and begin stitching around the outside edges of the star with a running stitch. Once you have finished with the first star, place the next star where you think it will look best (mine are about 3 inches apart).

finished star garland

After you have attached each star to the jute, you will now have a festive garland to decorate your mantle or food table for a summer party or wherever you decide to display it! You can get really creative with this project using a variety of shapes and materials. If you give it a try, be sure to let me know in the comments with a link to your finished project!

My project for this upcoming week? Going through some old Food Network magazines. Next week, I will let you know what I do with them.

Tackle It on Tuesday: Fabric Letters

This past week I tackled - Fabric Letters

Fabric letter making supplies

I was really excited about starting this new project and had high hopes about this one, that is until I realized how hard it is to machine sew some of the curves on the letters, yikes!

Hard to use purple ink on purple fabric

Hard to use purple ink on purple fabric

Plus, purple disappearing ink does not show up very well on purple fabric...

Almost finished...

Almost finished...

At this point, I just need to cut around the sewing lines and add a little bit of fray check to keep the fabric from fraying.

So will I be mass producing this project? Um, I think not. As cute as it is, I will finish this one up and keep it in our toy basket for when little people come over to play.

To tackle this week - a surprise

Burlap and fabric project in the works

Burlap and fabric project in the works

Working on the fabric letter project over the last week gave me an idea for a new project using burlap and fabric. Be sure to check back next week to see what I come up with!

What project are you tackling this week?

Tackle It on Tuesday: Homemade Pizza Sauce

This past week I tackled - Homemade Pizza Sauce

One thing my family loves to eat is pizza, especially homemade pizza! We keep our pizza pretty basic: homemade pizza dough, homemade pizza sauce, mozzarella cheese, little bit of cheddar cheese, and Parmesan cheese.

On the day that I have made up a batch of sauce, of course we will have pizza that night for dinner.

Homemade pizza and pizza sauce

Homemade pizza and pizza sauce

I bet you are wondering how I freeze up the rest of that pizza sauce. So glad you asked! I take individual snack size bags and put in about 1/4-1/2 cup of sauce. I just kind of eyeball it, no magic here. Then all of those individual bags, I place them in one big freezer bag.

Homemade pizza sauce, ready for the  freezer

Homemade pizza sauce, ready for the  freezer

Then that one big freezer bag hangs out in my freezer with all of that wonderful pizza sauce, ready for the next time we have homemade pizza. One nice thing about storing the pizza sauce in those individual snack size bags? Makes thawing quick and easy. 

Yes, we do like to get pizza from our favorite pizza place in town. But having the ingredients on hand for homemade pizza makes it do-able to have a homemade dinner in about an hour. 

To tackle this week - Letters from Scrap Fabric

One project I have pinned is to make Letters from Scrap FabricSince I have quite a bit of scrap fabric, I thought this would be a good way for me to use up some of my scrap fabric and make a fun project to sell to earn money for my next Compassion trip.

Letters from Fabric Scraps project

Letters from Fabric Scraps project

Think this is something you would like to purchase? Be sure to like my Facebook page, Gifts from Our Little Corner, where I am selling homemade items to earn money for my Compassion travels. Then check back next week to see how I tackled this project!

What project are you working on this week?

Tackle It on Tuesday: Civil War dress progress

Last week, I started working on a Civil War dress for a friend of mine. I knew I would not be able to have the whole dress finished by this Tuesday, which is okay. Some tasks take a bit longer, some can be finished a bit quicker. But making a bit of progress on some of these bigger tasks over each and every day gets you closer to the goal of finishing!

Bodice and sleeves are almost done!

Bodice and sleeves are almost done!

Over the next couple of days, I need to finish up the bodice and sleeves, then start working on the skirt. Hoping I can finish this big project up in the next day or two so my friend can wear it to a Civil War event this upcoming weekend!

In addition to working on this dress, today I need to put together a batch of pizza sauce.

Homemade pizza sauce ingredients

Homemade pizza sauce ingredients

When I cleaned out my freezer a couple of weeks ago, I realized we were out of homemade pizza sauce! We like to have homemade pizza about once a week, usually on Friday nights. I will share more about our pizza next week, so stay tuned!

What project are you tackling this week?